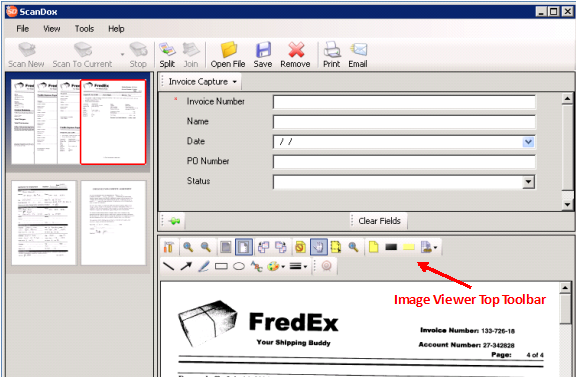
The Image Viewer Top Toolbar provides the same functionality as the DocuPhase Document Viewer Toolbar.

The ScanDox Image Viewer Top Toolbar tool icons are described in the following table.
|
Element |
Image Viewer>Top Toolbar Function Description |
|
Save A Copy
|
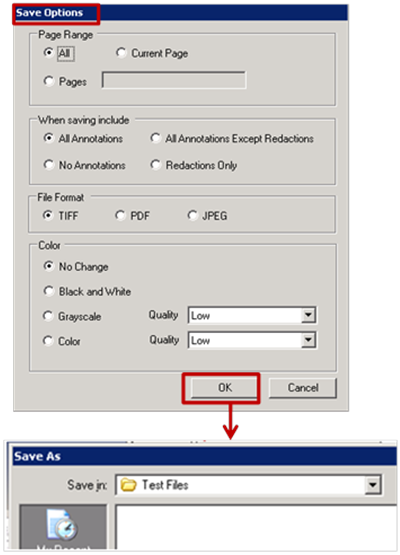
Launches the ScanDox Save Options Dialog window and provides the ability to save a copy of the document with user defined options.
Note: The changes are saved in your choice of directories.
|
|
|
Launches the Print Dialog window, where the user may select the printer, printer properties, printer range and number of copies.
|
|
|
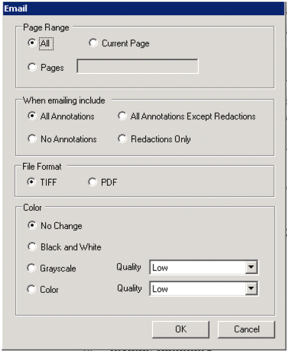
Launches the ScanDox Email Dialog window, where the user may determine a specific page rage, image options and page formats. Note: By default, the All Page Range has been selected. Only Redactions are included in the email and the page format is TIFF.
Note: Selecting OK launches your default email program and allows you send specified document to specific recipients.
|
|
Scan
|
Opens a Scan dialog box to initiate the scanning process. Note: This is a user configuration option within DocuPhase and may not be available on the menu bar. |
|
Settings
|
Launches the ScanDox Settings Dialog Window where the users may set General, Printing and Email preferences.
|
|
Zoom In
|
Provides the user the ability to enlarge the viewing size of the currently selected document within the Image Viewer Workspace. |
|
Zoom Out
|
Provides the user the ability to reduce the viewing size of the currently document within the Image Viewer Workspace. |
|
Best Fit
|
Provides the user with the best scaled view Scales the image to display in its entirety within the Image Viewer Workspace. |
|
Fit to Width
|
Allows the user to scale the image to fit to the horizontal edges of the Image Viewer Workspace. |
|
Rotate Left
|
Allows the user to rotate the selected document counterclockwise in 90-degree increments. Note: Multiple document thumbnail images may be selected and then rotated left with one click of this icon. Hold the following mode keys down while selecting multiple document thumbnails: § Hold the Ctrl-key and left-mouse click each thumbnail to include it in the selection § Hold the Shift-key and left-mouse click each thumbnail to include it in the selection |
|
Rotate Right
|
Allows the user to rotate the selected document clockwise in 90-degree increments. Note: Multiple document thumbnail images may be selected and then rotated right with one click of this icon. Hold the following mode keys down while selecting multiple document thumbnails: § Hold the Ctrl-key and left-mouse click each thumbnail to include it in the selection § Hold the Shift-key and left-mouse click each thumbnail to include it in the selection
|
|
Hide Annotations
|
Provides the ability to conceal annotations on the image from view on the selected document. |
|
Pan
|
Provides the ability to navigate across the surface of document. Note: This is a helpful feature, if you have zoomed in or out on the image. |
|
Select Annotation
|
Enables the user to select annotations or redactions on the selected document. Note: If there are not any annotations on the image, this option will not result in a selection. |
|
Note Annotation
|
Provides the ability to create a new note annotation on the selected document. Note: The mouse will change into a drawing object and you will be able to customize the shape and size of the annotation note. |
|
Insert Redaction
|
Provides the ability to conceal sensitive information on the selected document. Note: Redactions can be done with any color; however, the color is the default. |
|
Insert Highlight
|
Enables the user to highlight information on the selected document. |
|
Insert Rubber Stamp
|
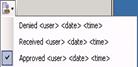
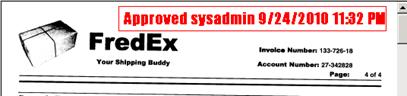
Places a Rubber Stamp on the image.
Note: Default options are Denied, Received and Approved. Additionally, the Date that displays is the current date and cannot be changed. Administrators may also add other Rubber Stamp options that you can select to insert.
|
|
Insert Line
|
Enables the user to draw a straight line on the currently displayed image. |
|
Arrow
|
Enables the user to draw a line with an arrow end point on the currently displayed image. |
|
Freehand
|
Enables the user to draw freehand on the currently displayed image. |
|
Rectangle
|
Enables the user to draw a rectangle on the currently displayed image. |
|
Ellipse
|
Enables the user to draw an ellipse on the currently displayed image. |
|
Text
|
Inserts a text box on the currently displayed image. |
|
Foreground Color
|
Provides a drop-down list of color options to be used for user-created lines, shapes and freehand illustrations.
|
|
Line Thickness
|
Provides a drop-down list of line weights to specify the thickness of user-drawn lines, shapes and freehand illustrations.
|
|
Request Target
|
Allows another application, like QuickBooks, to provide Index field data directly to ScanDox by clicking the Request Target “Bullseye” and a previously configured (iLink) “Send Data” button placed in the other application (e.g., QuickBooks).
This is a quick and accurate way to integrate other application programs with ScanDox without technical skills such as programming or scripting. Note: As a user is Indexing documents in the ScanDox Indexing Control, information present on screens in another program’s window can be automatically transferred to one or more Index fields in the Indexing Control (as previously configured for the indexing application using the DocuPhase iLink product). The Request Target “Bullseye” icon on the Top Toolbar is used to identify the current document in the ScanDox Index Control as the “Target” -- Then a previously configured button placed in a separate program’s window (like the QuickBooks application) can be clicked to transfer a copy of data on its screen into the ScanDox Indexing Control fields. |