Indexing
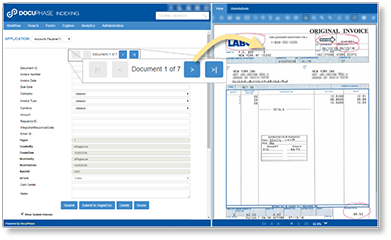
When a Document is uploaded into the system, it must be "Indexed" so that it can later be submitted to the Repository, then easily found when needed. Indexing is the process of adding data to Index fields: making it possible to search for and find specific Documents or sets of Documents. Once properly Indexed, a Document or file may be submitted for capture to the DocuPhase Platform for storage, management, and protection.
TIP
Once you perform a document Search of any kind, the Results and Viewer screens appear. Then to view the Indexing screen, from the main header, go to Captureu ![]() LOADuIndexing.
LOADuIndexing.
Tell me about...
- Working with UDLs (User Defined Lists) and Indexes
- Capturing (Uploading) Documents
- Viewing and Annotating Documents
- Editing Index Values (Entries/Selections)
Tell me how to...
Once a Document has been Captured, unless it has been processed via automatic Indexing, you need to manually Index it (enter the appropriate information into each of the Index fields) . Indexing makes Documents easier to find and access in the future.
TIP
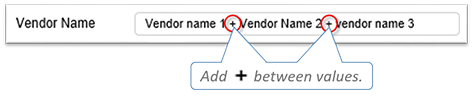
Remember that you can Index the same Document using multiple values for a single Index text field using + (the plus sign on your keyboard). The Document can then be searched for using ANY of the Index values entered. Please note that this technique can only be used in text and number (i.e., free typing) fields, not in a UDL.
EXAMPLE
Sometimes, a vendor may be known by three different names. You probably don't want to have to enter that same Document 3 ways. Instead, you can simply enter the three different names in the same Index field using the + between each name.
Once you do this, you can use any of the names to find the Document.
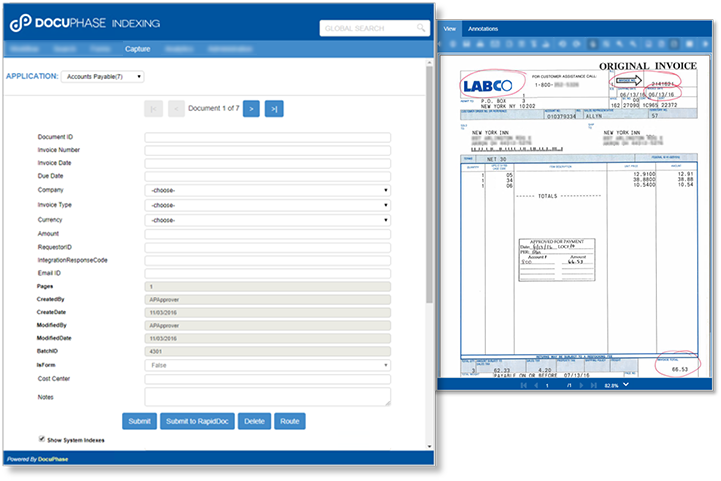
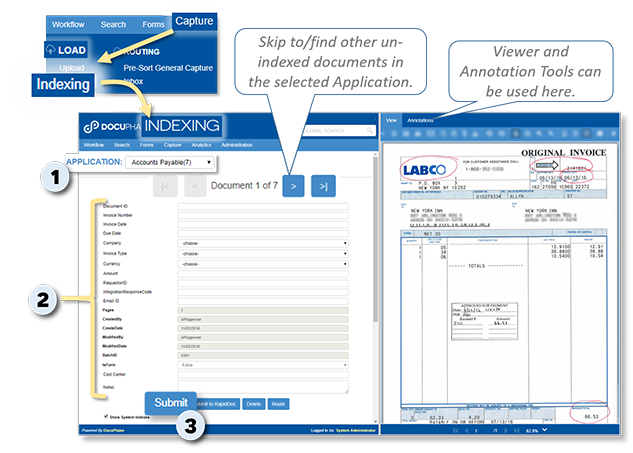
On the Indexing screen:
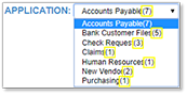
1) Select the Application containing the Document(s) you want to Index.
- The first Document that has not yet been Indexed in the Application appears in the Viewer.
- only Applications with un-Indexed Documents appear.
- the number of un-Indexed Documents appears next to the name of the Application.
TIP
In the drop-down list of Applications...
2) Enter/select Index information, as appropriate.
- In Applications containing multiple Documents that require Indexing, use the navigational buttons at the top of the Indexing window to skip Documents without submitting them.
- You can also use the Viewer (and Annotations) tools on this screen, as well. Tell me more...
TIP
When you have completed Indexing:
3) Click  to move the Document into the Repository.
NOTE
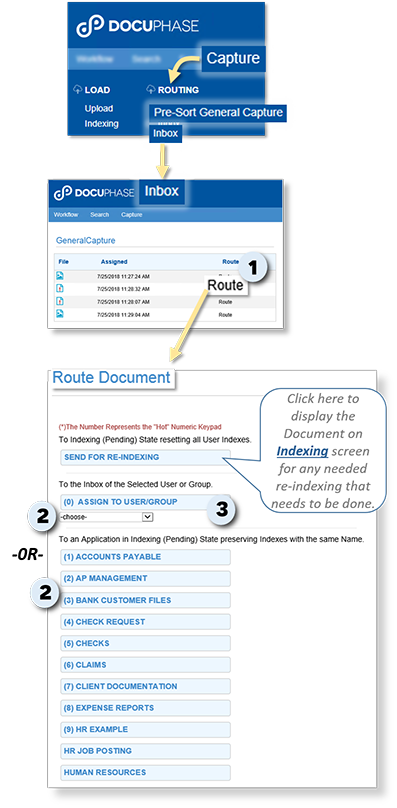
You can access the Indexing screen as soon as you upload a Document, from the main header via Capture Load Indexing, or by clicking on Send for Re-Indexing from the Route Document screen.
At the bottom of the Indexing screen:
1) Click  to display the Route Document screen.
OR
From the General Capture Inbox:
Click Route next to the document you want to route to display the display the Route Document screen.
In the User or Group drop-down list on the Route Document screen:
TIP
You can use the Send for Re-Indexing option to return to the Indexing screen.
2) Select the name of the User or Group to whom you want to assign this Document (e.g., for Indexing).
3) Click Assign to User/Group to complete the setting and route the Document to the selected Inbox.
OR
From the list of Applications:
Click on the Application in which you want the Document to reside.
- This automatically associates the Document with the selected Application.