
Select the Document Identifiers tree node or an existing Document Identifier tree node after which you want to add the new document identifier.
To add a document identifier, follow these steps:
1. Click the Add Document
Identifier button.
A new document identifier node (Draw Zone) is created, as shown below.
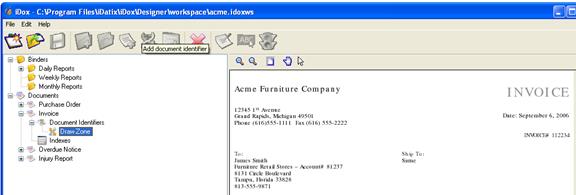
2. Using the Select Zone arrow tool in the Image Viewer, draw a zone around an area on the displayed page that contains a value to be assigned to the document identifier.

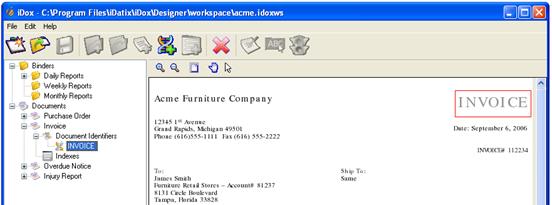
iDox automatically extracts the value within the zone and will change the identifier node from “Draw Zone” to the value extracted, as shown below.
If a zone is drawn over multiple lines as shown in the red outline below, iDox will be unable to extract a value from the zone because it will not be able to tell which value to use. The identifier node will then prompt you to Set Properties.
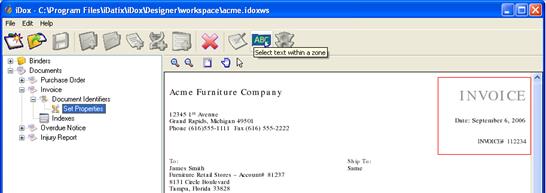
To isolate a single value from a zone in which multiple values are selected, you can use one of three methods:
1. Redraw the zone so that it covers only a single value;
2.
Click the Select Text Within a Zone button on the main toolbar (see
illustration below) to draw a zone within the larger zone. This inner zone must
be drawn around a single line of text.
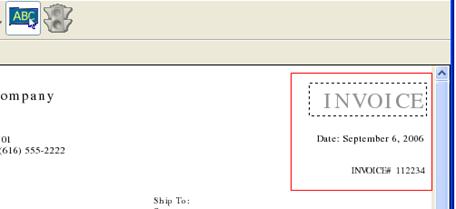
It will display as dashes as it
is drawn and will disappear when the mouse button is released. If the selected
zone is valid, the identifier node will change from Set Properties to the value
extracted from the inner zone.
In the illustration below, drawing a new zone within the original zone (around the text, INVOICE) will extract INVOICE and change the tree node from Set Properties to INVOICE
3. Set properties for the identifier to manually enter a literal or mask to extract an identifier value from the zone.